Wednesday, December 5, 2012

HOLIDAY HOME TOUR - Part 1

Since I can't have all of you in to admire all my hard work, I thought I would share my Christmas decorating with you in this way. Getting everything out involved some climbing - my Vintage Boy shudders every time he hears my stepstool/ladder open up. I did take a tumble last week, but that was just walking across the floor while talking on my cell phone. I guess I can't walk and talk at the same time anymore. Oh my!

There are a lot of pictures, so I will divide it into three separate posts. We'll start on top of our bookcase/TV cabinet. Sit back and enjoy...


These two figurines have been a part of my Christmas for as long as I can remember.

This shelf of the bookcase holds three of my giraffes, a beautiful old bowl and plate set that is overflowing with pinecones, and a Christmas tray and four mugs that was a gift many years ago. I think the mugs long to be filled with some hot cocoa and marshmallows.


These two chenille snowmen always make me smile - the two little ones are part of a garland.
This area in below our front window is very red and white. Red Transferware lends itself to the Christmas season, so there is my teapot, a little pitcher holding some small spoons and a cup/saucer that is part of my collection. Only one of the two glittery deer that are on the windowsill shows up in the picture. The red twigs in an ironstone pitcher are pointing to an assortment of ornaments and a sparkly star that are hanging there.

So beautiful! 

Outlets and cords aren't very pretty, so this shutter is hiding them.

See how nicely our little half tree fits between the two chairs - hanging on a screen. It doesn't take up any of our precious floor space.


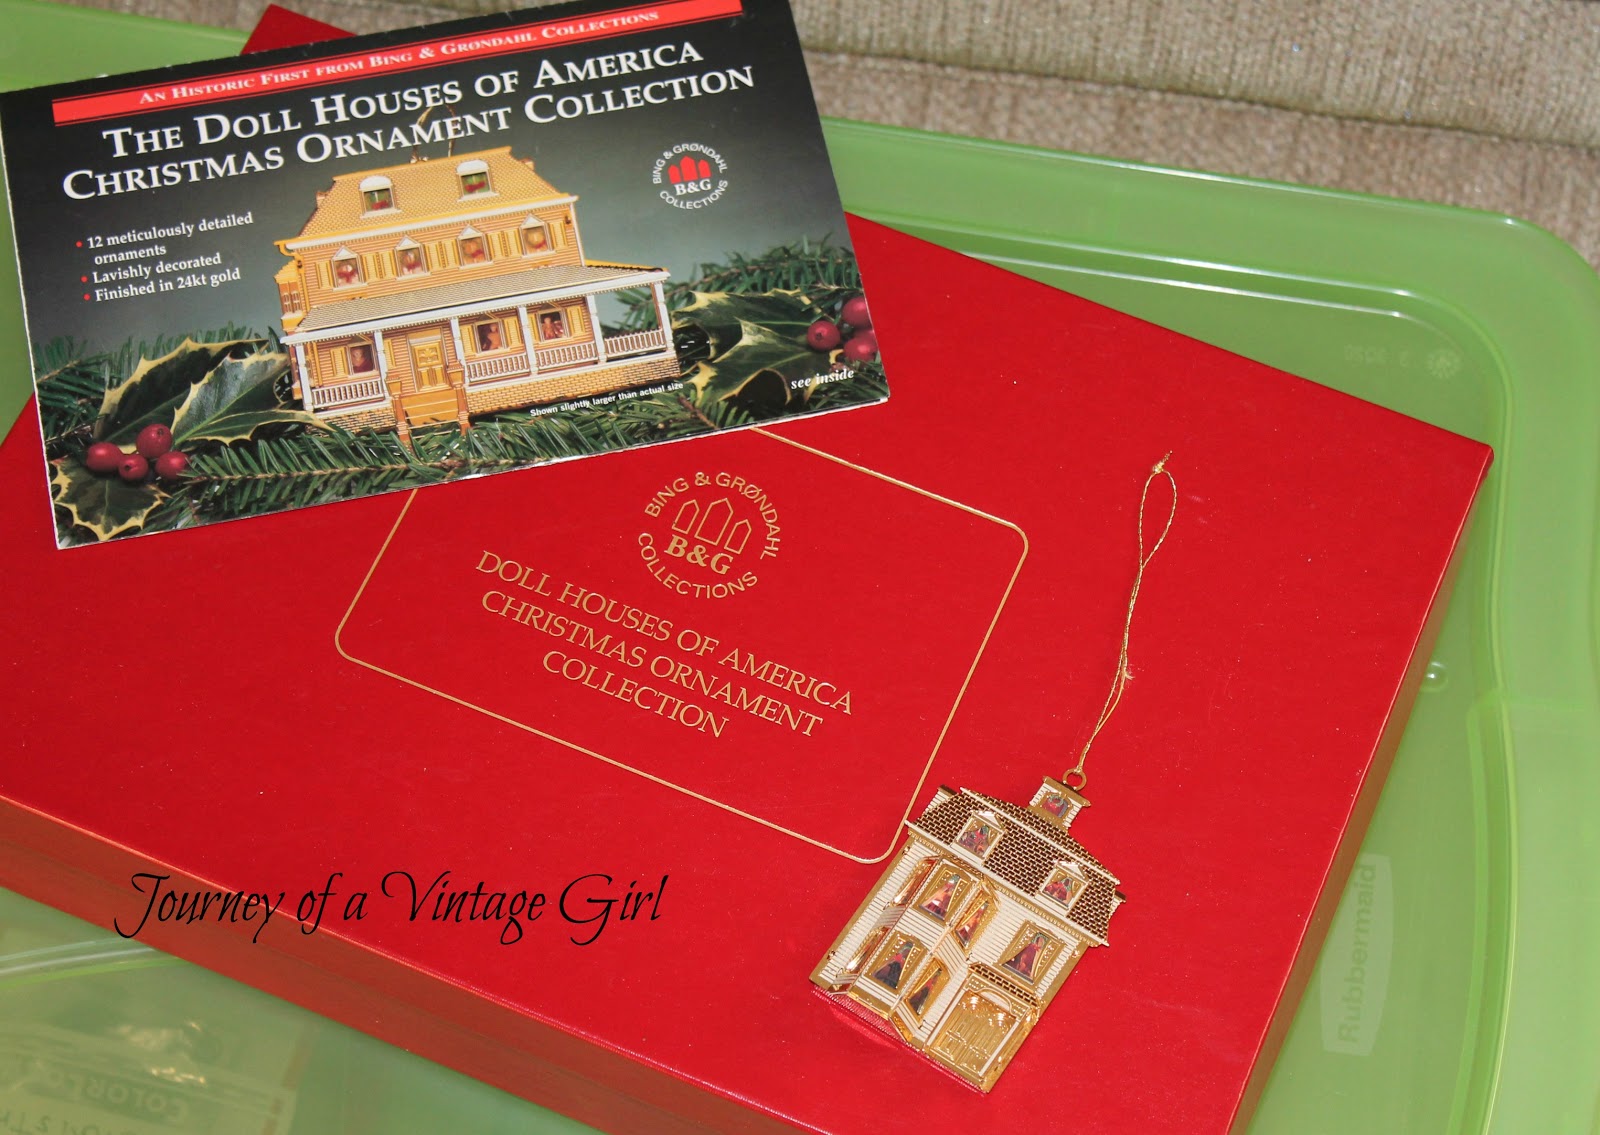
 I've decorated the tree with a few Snowbabies ornaments and a collection of tiny victorian houses. Then added some sparkly doodads to fill in and add a bit of pizazz!

I think it's time to sit back with some coffee in my Christmas mug and look through a Christmas magazine.

So that concludes Part 1 of my Holiday Home Tour. Hope you've enjoyed it! I would love to see your decorations. Please come back soon for Part 2!

 
Until next time...
Blessings,

Gail

Monday, December 3, 2012

RECIPE FOR YUMMY MEMORIES

As I was looking through my recipe box for my Spritz Cookie recipe, I was struck again by how many wonderful memories are tucked in there. I'm all in favor of printing recipes out on sheets of paper and organizing them in a binder for quick retrieval, BUT that process will never produce the fuzzy, warm feelings that pop out of my old recipe box!


My Spritz Cookie as well as a wonderful Moist Oatmeal Cookie recipe came from Fern V, an old neighbor and friend. There are several that came from gals who were co-workers and are still friends - Phyllis T's Sour Cream Raisin Bars, Linda A's Oatmeal Bars, and Edna F's Almond Sugar Cookies. I spotted a Marshmallow Nut Bar recipe from Marlene T, a wonderful neighbor from when our children were small. Then there are the sugar cookies that call for brown sugar from Delores C. that I call State 'B' Cookies because she brought them to the State 'B' Basketball Tournament many years ago, and we loved them. And these are just a few from the Cookies Section.


Of course there are many that came from my mother and mother-in-law - from back when they were trying to help me with my kitchen/homemaking skills. But it's not just the memory of who the recipes came from, but when they were made and served.  For example the Cut-Out Sugar Cookie recipe brings back the memory of making heart-shaped cookies for our oldest daughte'rs whole class when she was in 1st or 2nd grade. She dropped them all on the way to school. I'm not sure which one of us shed more tears over that episode, but it brings a smile to my face whenever I run across that recipe.

So, I plan to hang on to the old, spotted and yellowed recipe cards in my box even if I re-type them to make a handy dandy 3-ring binder recipe book. I have seen it suggested to frame recipe cards that are written in your mothers or grandmothers handwriting... I might have to work on that project.

Until next time...

Blessings,
Gail

Saturday, December 1, 2012

SKATING

I'm wishing I still had my old ice skates - they would be hanging on my front door this Christmas season. During my teen years my friends and I spent a lot of time at the ice rink. The city would flood it about this time of the year, and if memory serves me, it stayed frozen until Spring. It seems our winters were colder back in "the good old days."

It was about a five or six block walk with the snow crunching under my feet, so before I hit the ice my toes were already cold. There was a small building there called a warming house, but there was really nothing warm about it. Mainly it was a place to get out of the wind, and it was a place for couples to find a little privacy.

The rink provided an important gathering place for teens during that era. Other than a Friday night ballgame, there weren't very many opportunities to get together. That is hard to imagine with the busy lifestyles that todays kids lead.

So, I have fond memories of that place, skating round and round, back and forth, frontwards and backwards, hoping that special fella would come along and skate with you.

I don't have any pictures of me or my friends skating, but I have several of my dad. He and his siblings skated on the Brule Creek that flowed right by their home. I have a very beat up hockey puck that they used for a little game of ice hockey.

Evidentally ice skating has provided entertainment for several generations.

(Skate photo from opulentcottage.typepad.com)

Until next time...
Blessings,

Gail

Wednesday, November 21, 2012

THE TREE IS HUNG

When I had my shop, Christmas decorating started in September; so this year I have been wanting to drag out the holiday decorations for some time. I think I've shown great restraint waiting till this week. We will be going to our daughters on Thanksgiving, so I gave myself permission to begin.

And, yes, I did say the tree is hung. Since floor space is minimal in our home, there were a few years when I didn't put up a Christmas tree. Then my Vintage Boy found a 'half tree' at an auction several years ago - it is made to hang on the wall. I have always hung it above our dining table, which butts up against the wall, but then if we pull the table out for company, the cord is hanging there. So this year I solved that problem by hanging it on a metal screen in our living room. This is a picture of it before decorating.


I decorate my little tree with two types of ornaments. My mothere gave me a collection of victorian house ornaments many years ago. It was one of those offers where you get one a month for a year. Well, she never was a patient person, so she bought the group of 13 all at once. When you hold them up to the light, you can see the furnishings and people through the windows.  I love them, and have used them in many ways over the years.

And I also use SnoBabies ornaments on my tree. A friend and co-worker gifted me with one, and I continued to buy one every now and then until I had a nice little assortment. It is a delight to unpack them each year and hang them on the tree. They have such sweet little faces.


So here's how my little hanging tree looks when all decorated and lit. I'm lovin' it!

Well, I'm sitting here with boxes of Christmas 'stuff' all around me - I'd better get back to it! But before I go, I want to be sure to wish you and yours a wonderful Thanksgiving celebration! And, enjoy decorating your home for the Christmas season.


Until next time...
Blessings,
Gail

Saturday, November 17, 2012

SEVEN-MINUTE FROSTING

I just saw this picture posted on Pinterest with a link for the Seven-Minute Frosting recipe. Memories! My mom used to make this frosting fairly often - I've never tried it because it seemed like a lot of work; but I might have to give it a whirl when we have a special event.

I remember the pan she used to make this - wish I had it now. It was a white enamel double boiler with a narrow black stripe on the edges. The frosting was wonderful on a chocolate cake, but here's the best part... the recipe made more than one cake could hold. Mighty tasty!

Seven-Minute Frosting Recipe

Ingredients

| metric conversion
  • 3/4 cup granulated sugar
  • 1 tablespoon light corn syrup
  • 3 large egg whites
  • 1/8 teaspoon salt
  • 1/2 teaspoon vanilla extract

Directions

1. In the metal bowl of a standing mixer set over (but not touching) a saucepan of simmering water, combine the sugar, corn syrup, 3 tablespoons water, egg whites, and salt. Cook over medium heat, stirring frequently, until the sugar has completely dissolved, 3 to 4 minutes.
2. Attach the bowl to the mixer fitted with the whisk attachment. Beat the mixture on high speed until glossy, thick, and billowing peaks form, about, well, you know, 7 minutes. (Although truth be told, sometimes it doesn’t take quite that long. When in doubt, just look at the picture above; that’s what you want.) Beat in the vanilla. Use immediately.

Adapted from Martha Stewart’s Baking Handbook | Clarkson Potter, 2005
Makes about 4 cups, enough for a two-layer 9-inch cake


Till next time...
Blessings.
Gail

Friday, November 16, 2012

CHRISTMAS STOCKINGS

When our kids were little my mom made Christmas stockings for them, and it was always special when we brought them out each year and hung them on the fireplace mantel. And so to carry on the tradition, I have made Christmas stockings for my grandchildren. The first ones - quite some years ago had a patchwork look to them and were trimmed in various buttons, lace, ric rac, etc.

And now I have two younger grandchildren, and so I needed to carry on the tradition. This first stocking was made for Cooper, and I took the pattern out of a quilting magazine. I thought it turned out pretty cute, and the snowman was appropriate for a little boy.


While on a Christmas Tour of Homes I spotted some white stockings with a fur cuff, and they were the inspiration for the stocking I made when Kennedy came along. When it came time to choose the fabric I made the decision to cut up my wedding dress. It seemed silly to just keep it in the closet never to be used again, and I had always loved the fabric. I love how it turned out, but it was difficult to get a picture of it because of how it reflected the light - probably time to learn how to use the different settings on my camers.


How-to Info: The satin brocade fabric in my wedding dress had yellowed over the years, so I took the chance and washed it using a RIT whitening product (don't remember the exact name). It worked wonderfully in getting rid of the yellowing, but it also seemed to take the body out of the fabric. I took care of that by using an iron-on interfacing. To line it I use pink satin, and found a fur-like fabric to use for the cuff. The rhinestone 'k' I found on a key-ring and attached it to the stocking with a pearl button. If you need specific instructions on constructing a lined stocking, I'm sure you can easily find one on the internet.

Now, what am I going to do with the rest of that fabric?

Till next time...
Blessings,

Gail

Monday, November 12, 2012

TIME TO SEW FOR CHRISTMAS...

These are fabrics that I purchased several months ago when the Christmas fabrics first came out. I think the time has come to sew them up!


I seem to be especially drawn to prints that include words, and there are a lot of choices out there - not only for Christmas.
When I bought these, I had no idea what I was going to do with them, but have decided to make a valance for my kitchen window. And hopefully I will have enough to also make a table runner. That should make my kitchen cheery and fun for the Christmas season! I'll share pictures when I finish.


These fabrics are a little quieter. I fell in love with the subtle batik with the snowman family printed on it. I'm still not quite sure what to do with this winter print. Pillows? Do you have any suggestions?


Hope you're having a wonderful day!

Until next time...
Blessings,
Gail